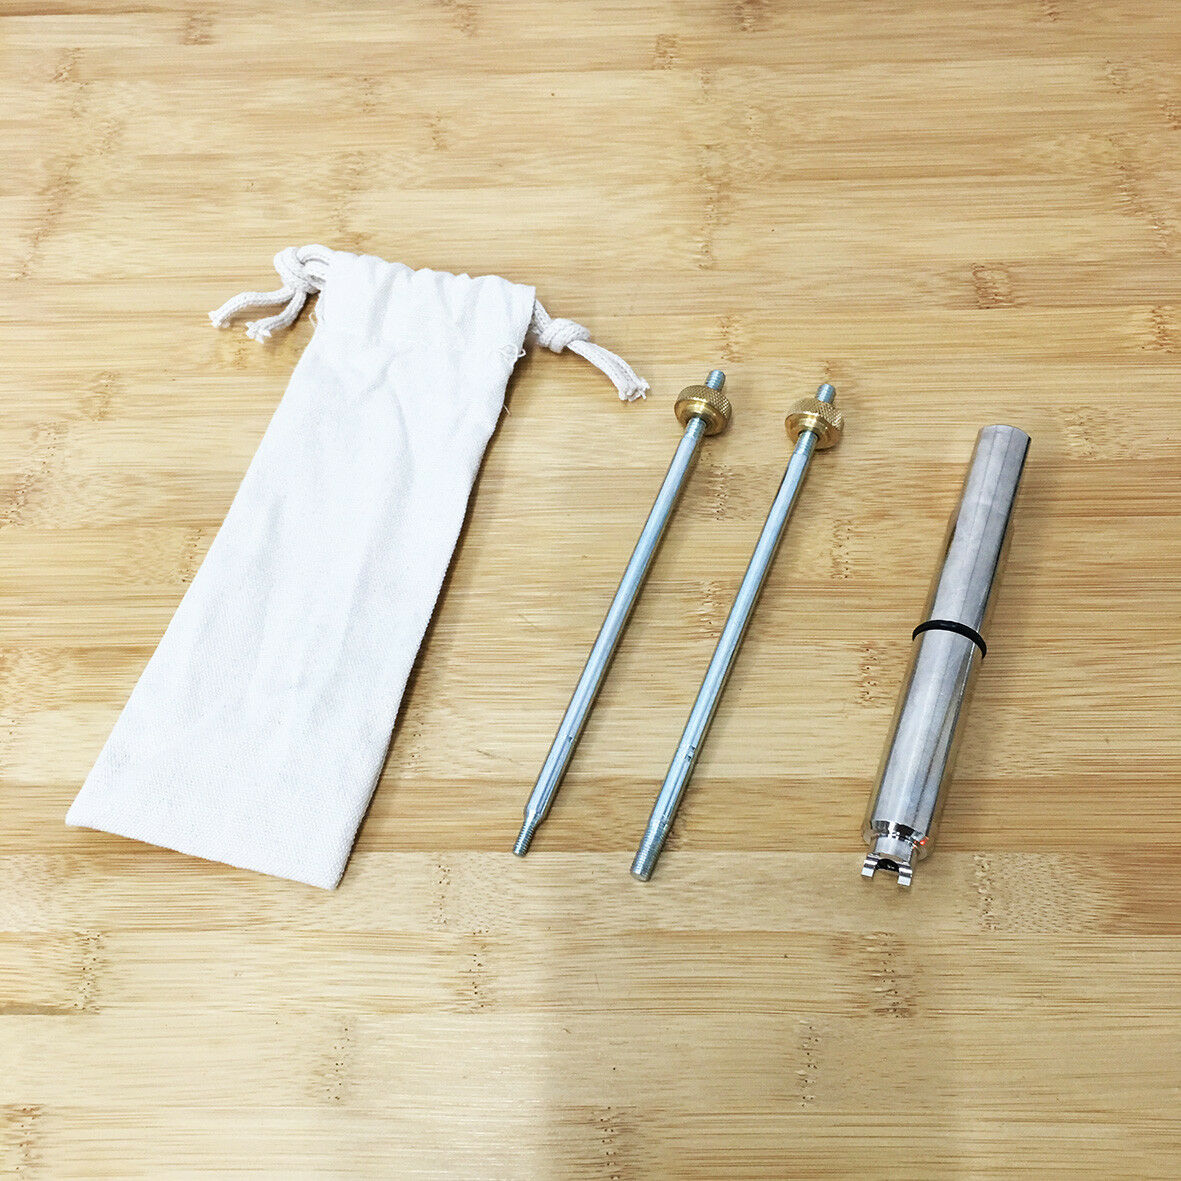
Coleman Lantern / Stove Check Valve Removal Tool Professional tool
$16.89
396
Custom Bundle: No
Item must be returned within: 30 Days
All returns accepted: Returns Accepted
Return shipping will be paid by: Buyer
Modified Item: No
Non-Domestic Product: No
MPN: Does Not Apply
Condition: New
Brand: Unbranded
Coleman Lantern / Stove Check Valve Removal Tool Professional tool and nice looking stowage bag
Works with newer style wide slot check valves. Probably will not work with 242 or early 242A without the air stem or the 220D/228D and prior. Check back as I will be offering check valve tools for these.
Adaptation check valve type : All type /Coleman USA,Canada,Current product.
The kit contains EX rod, brass nut with knurled x2, stowage bag, large threaded rod and a small threaded rod each with an 8-32 and ¼-32.
Big tool Material : Medium-carbon steel / Surface treatment chrome plating
Coleman produced by the vaporization lamp furnace are applicable
Such as the North Star (Note A), 200A, 220,222,226,228,236,242,275,285,282,286,288,290,290,295,321,635,639 vaporization lamps and 502 , 508A , 530 , 533 ,550 vaporization furnace.
519 Heater.
Detail
1.Remove the air stem from your lantern’s check valve in order to determine which of the two threaded rods to use (8-32 or ¼-32 thread)
2. Hand screw the rod into the check valve at least finger tight. Engage as much thread as possible.
3. Slide the tube down over the rod.
4. Make sure that the ears are fully engaged in the slot. Gently turn the tube until the ears drop into the slots cut in the check valve.
5. Drop a washer onto the rod and then screw on one of the 7/16, nuts (1/4-20 thread) and tighten just enough to eliminate any play in the tube and lock it into place. Caution: Do not over tighten as the brass threads in the check valve may strip!
6. Using adjustable wrench, fit it to the flats on the exposed end of the tube.
7. Hold the fount in a solid grip. If you have a vise, this is a great application for it. Give the wrench a solid turn counterclockwise. Do not side load the wrench. The check valve will loosen and you will be able to remove the entire assembly with the check valve attached.
8. Clean and loosen the ball bearing in the check valve and when free, screw the check valve back into the fount, or use a new replacement valve.
Be careful not to reinstall the valve too tight! It’s also a good idea to lightly coat the tool with oil as it can rust in a damp environment.
When re-installing, be careful not to turn too tight.
Note A. This kit check valve disassembly tool, for the North Star check valve dismantling, can not use the threaded rod to lock, but also can break the check valve, but can not be locked in place, do not use the screw, To prevent damage to the North Star check valve! Please pay attention to dismantling.
The lantern and stove is not for sale.

